Ice dams can absolutely cause real roof leaks in Connecticut, and the frustrating part is they often keep coming back until the root cause is fixed. Our team at Modern Way Roofing deals with winter roof leaks every year, especially after snowfalls followed by a warm-up. The pattern is usually the same: snow melts, refreezes at the eaves, water backs up, and it finds a way under the shingles. This guide gives straight answers first, then explains what's happening so you can stop repeat leaks.
Why Ice Dams Are a “Roof Repair” Problem (Not Just a Winter Nuisance)
The Leak Mechanism in Plain English: melt → refreeze → backup → water under shingles
What's happening is simple. Parts of your roof warm up (often from heat escaping the house), so snow melts and water runs downhill. When it hits the colder roof edge, usually the eaves over the unheated soffit, it refreezes. Over time, that refreezing builds an "ice wall." Once that wall is there, new meltwater has nowhere to go, so it backs up and slips under shingles and into the roof system.
The Real Cost: hidden moisture, insulation saturation, interior staining, rot risk
Ice dam leaks can look minor inside, one stain, one drip, but the damage often spreads where you can't see it. Water may soak insulation, run along framing, and sit against roof decking before you ever notice it in a bedroom ceiling.
Common downstream issues include wet insulation (which stops insulating well), attic moisture buildup, mold-friendly conditions, and wood rot along the roof edge. In tougher cases, you'll also see fascia/soffit damage or gutters pulling and sagging from ice weight.
What an Ice Dam Is and How It Forms
Where it builds: eaves, gutters, valleys, dormers, skylight areas
Most ice dams are built where water naturally slows down or collects. In Connecticut, you'll commonly see ice forming:
- Along the eaves and roof edges
- Inside gutters and at downspouts
- In roof valleys
- Around dormers and roof transitions
- Near skylights, chimneys, and vent penetrations
Those areas don't always "cause" the problem, but they're where the symptoms show up first.
The chain reaction that creates repeat leaks during warm-ups and overnight freezes
Repeat leaks happen because winter weather bounces around freezing. One day melts snow, the next night locks it back into ice. Then the next warm-up restarts the meltwater backup. If nothing changes (heat loss, insulation gaps, ventilation, drainage), the leak can return in the same spot again and again.
Root Causes That Make Ice Dams More Likely
Attic Heat Loss (Air Leaks) That Warms the Roof Deck
The #1 driver is usually heat escaping into the attic. Even a well-insulated attic can still leak warm air through small openings. Common air-leak spots include attic hatches, recessed lights, plumbing stacks, wiring holes, and bathroom fan ducts that aren't vented properly.
When warm air reaches the roof deck, it creates the melt that starts the whole cycle.
Insulation Gaps or Compressed Insulation That Create “Hot Spots”
Insulation isn't just about "having it", it's about having it evenly. If insulation is missing or compressed at the edges, the roof warms in patches. That uneven heating creates uneven melting, which makes refreezing at the roof edge more likely.
Also, once insulation gets wet, it loses effectiveness. So a small leak can make the next ice dam problem worse.
Ventilation Problems That Trap Warmth and Moisture
Good attic ventilation helps keep the roof colder and drier. When ventilation is blocked or unbalanced, warm air and moisture hang around longer. That can lead to frost on nails, damp roof decking, and more melt/refreeze activity at the roof edge.
Snowpack and Roof Design Factors (Complex Rooflines, Valleys, Transitions)
Some rooflines are just more prone to ice dams, especially homes with multiple valleys, dormers, pitch changes, skylights, and chimneys. Those features create extra seams and "collection points" where water can pool and refreeze.
Drainage Contributors (Gutters/Downspouts Issues That Worsen Backup)
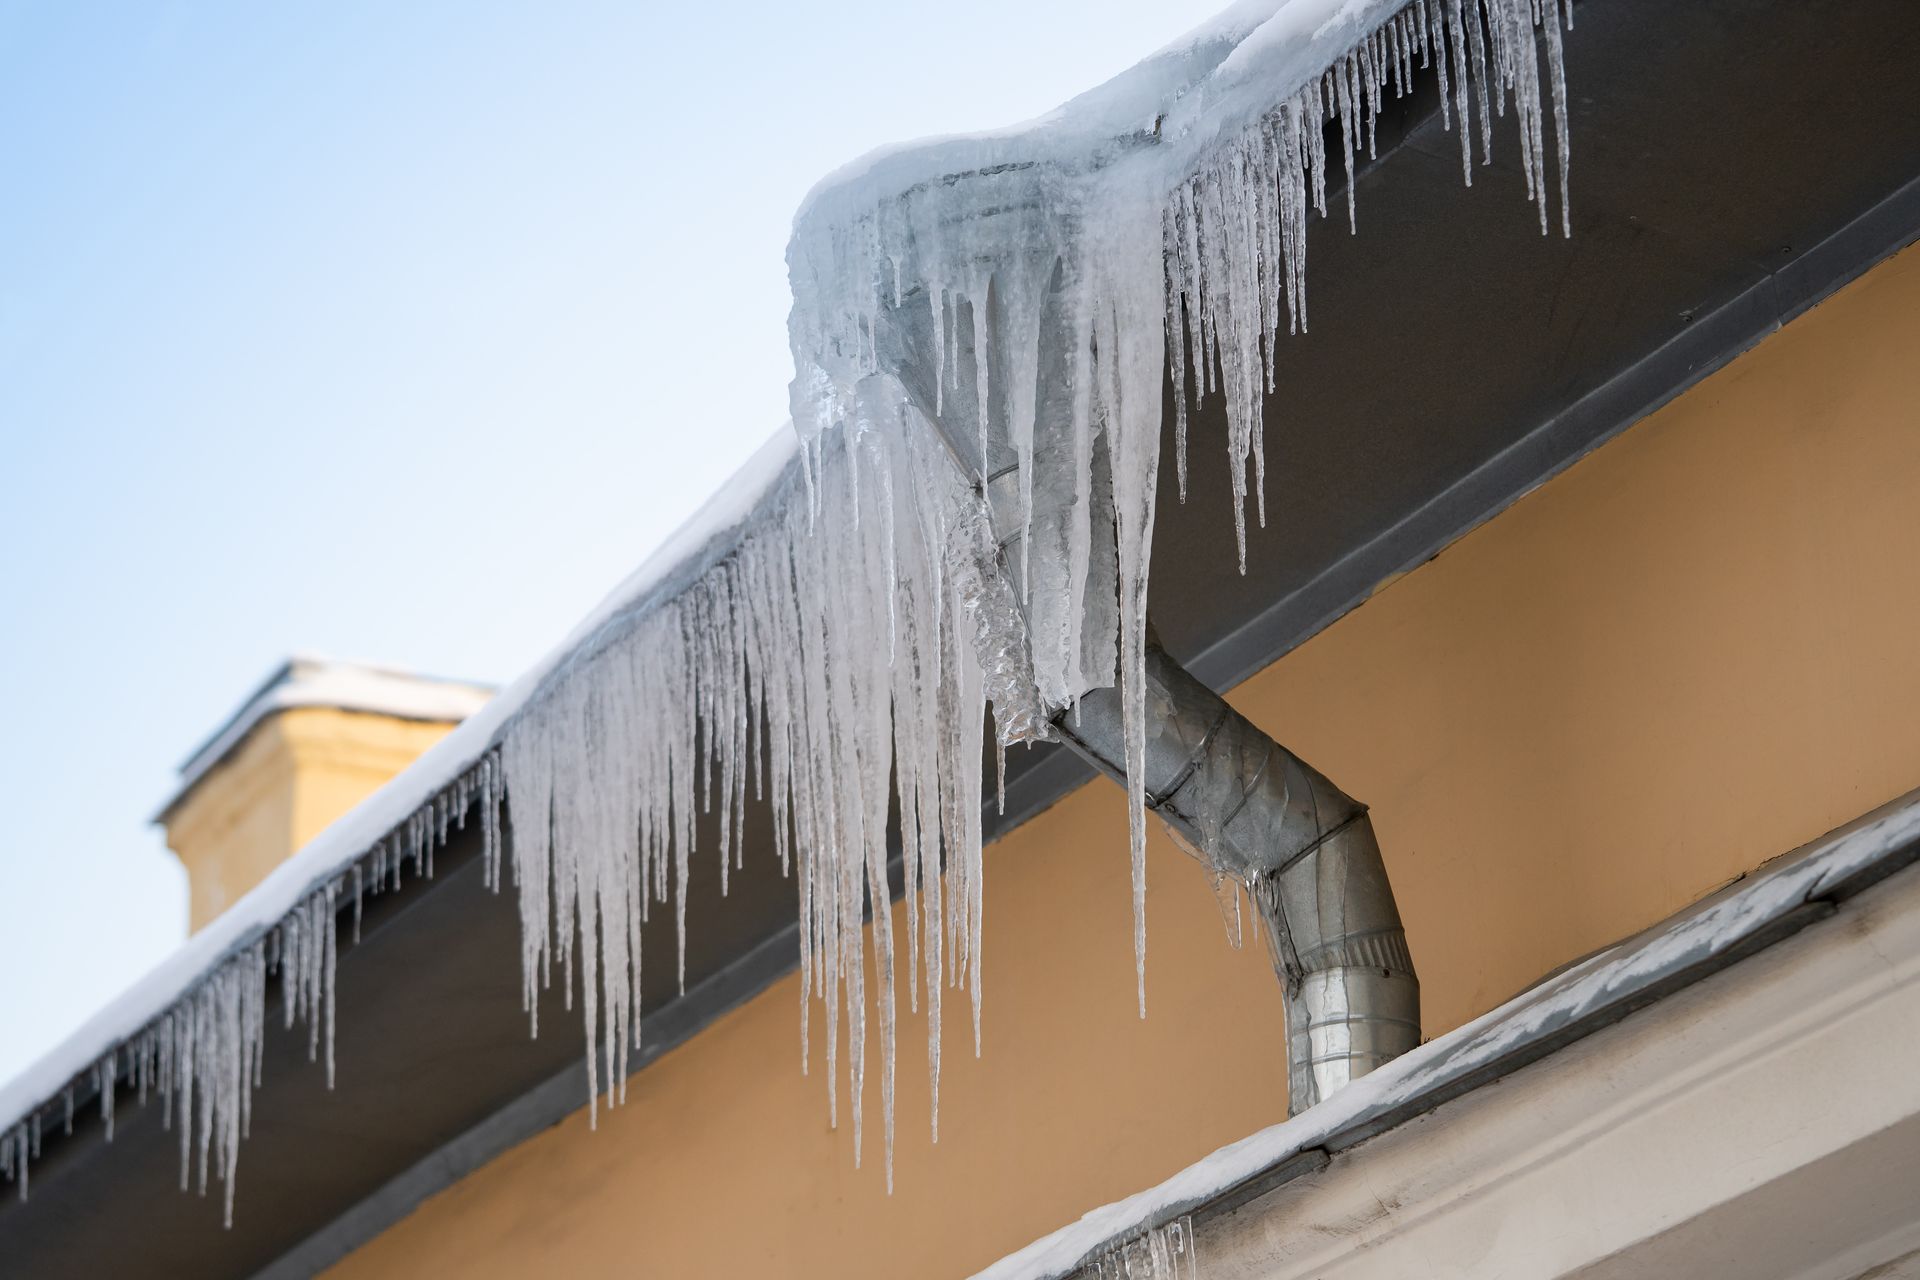
Gutters don't create ice dams on their own, but they can make the situation worse. If gutters are clogged or downspouts freeze up, water slows down and refreezes faster. You'll often see bigger icicles and more ice packed along the roof edge when drainage is struggling.
Warning Signs Homeowners Miss Until the Damage Shows Up
Exterior Clues
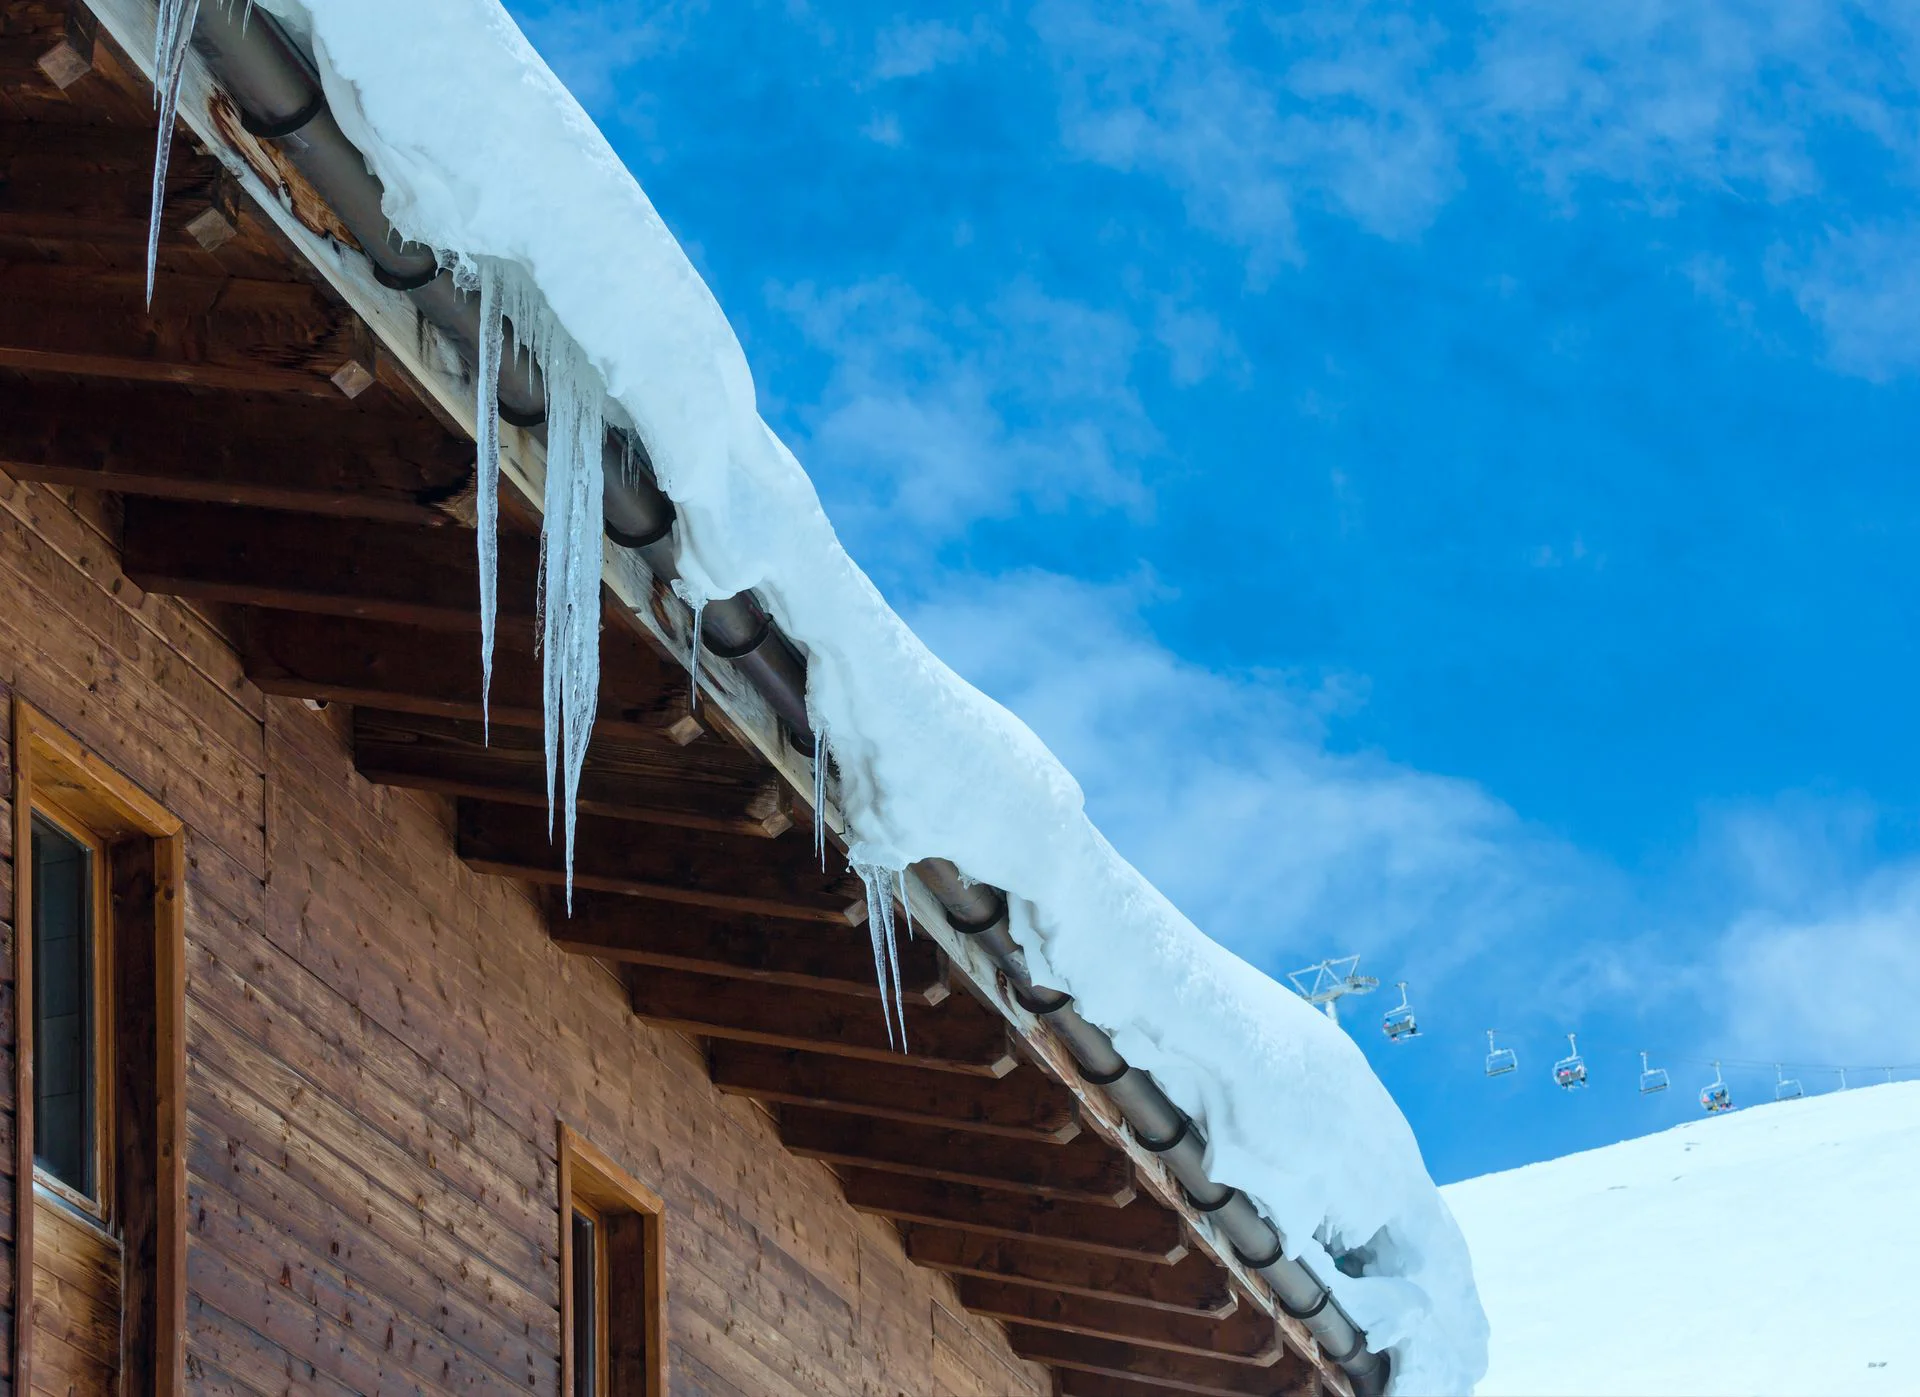
A good quick rule: big icicles usually mean meltwater is refreezing somewhere it shouldn't. Watch for:
- Thick ice along the roof edge or packed in gutters
- Large icicles that keep reforming after you knock them down
- Patchy melt patterns (some roof sections melting faster than others)
- Ice buildup in valleys or around skylights/dormers
If you see those signs after a snow + warm-up, the conditions are right for backup.
Interior Clues
Inside the house, the clues often show up later, and sometimes far from where water entered. Look for ceiling stains near exterior walls, bubbling drywall, peeling paint, damp trim, or drips around skylights. In the attic, a musty smell, damp insulation, or staining on roof decking are all red flags.
What to Do Immediately if You Suspect an Active Ice-Dam Leak
Contain the Water First (reduce interior damage fast)
Your first goal is damage control. If there's active dripping, catch it with a bucket, move valuables, and protect floors. If drywall is bulging, treat it seriously, wet drywall can fail and collapse.
Document What You’re Seeing (helpful for repairs and insurance conversations)
Take quick photos of the interior stain/drip and the exterior ice buildup. Also note when it started (for example, "day after the thaw"). Those details help diagnose the source faster and can be valuable for insurance claims.
Prioritize Safety: ladders + ice + roofs = high-risk
This is worth saying clearly: icy ladders and roofs are dangerous. If you can't do something from the ground safely, don't force it.
Short-Term Fixes That Reduce Leak Risk Without Wrecking the Roof
Safe Snow Removal From the Ground (Roof Rake Approach)
Removing a few feet of snow near the eaves can reduce the amount of meltwater feeding the ice dam. A roof rake can help, but use it gently, aggressive scraping can damage shingles.
Creating a Controlled Drainage Channel (Calcium Chloride “Sock” Method)
Some homeowners use a fabric "sock" filled with calcium chloride to melt a narrow path through the dam. This can relieve pressure by letting water drain. It's a short-term tactic, not a root-cause fix, and it needs care. Avoid rock salt, which can be harsh on metals and roofing components.
Clearing Obvious Drainage Bottlenecks Where Safely Accessible
If downspouts are completely blocked at ground level, clearing that exit can help water move away from the house. Don't yank on frozen gutters or pry ice off, gutters can bend or pull loose.
Temporary Interior Mitigation While You Wait for Conditions to Improve
If moisture is present indoors, run a dehumidifier and keep airflow moving. The goal is to limit secondary damage while the weather stabilizes and a proper repair can be planned.
What Not to Do (Common DIY Moves That Cause More Damage)
Chipping Ice With Hammers/Shovels
This often breaks shingles, dents gutters, and damages flashing. It can turn a "leak risk" into an actual roof repair you didn't need before.
Dumping Rock Salt on the Roof or Into Gutters
Rock salt can accelerate corrosion on metal flashing, fasteners, and gutters. It's also not a controlled way to manage melt paths.
Climbing Onto an Icy Roof “Just to Break a Channel”
Even experienced homeowners get hurt doing this. If access isn't safe, pause and call a pro.
When to Call a Pro for Ice Dam Roof Repair
Clear “Call Now” Scenarios
If you have active leaking, heavy ice across long eave runs, rapid icicle growth over entryways, sagging gutters, or a steep/multi-story roof, it's time to get professional help. For immediate assistance with winter roof leaks, consider emergency roof repair services. Also, if it happens in the same area every winter, that's a strong hint the real problem is heat loss/ventilation, not just the ice you can see.
What a Good Professional Visit Should Include (Beyond “Remove Ice and Leave”)
Ice removal alone doesn't stop repeat leaks. A good visit should include a roof-edge assessment, flashing checks, and (when possible) an attic review to identify insulation gaps, air leaks, and ventilation issues that are feeding the melt/refreeze cycle.
How Ice Dam Roof Repair Typically Works (Once Conditions Allow)
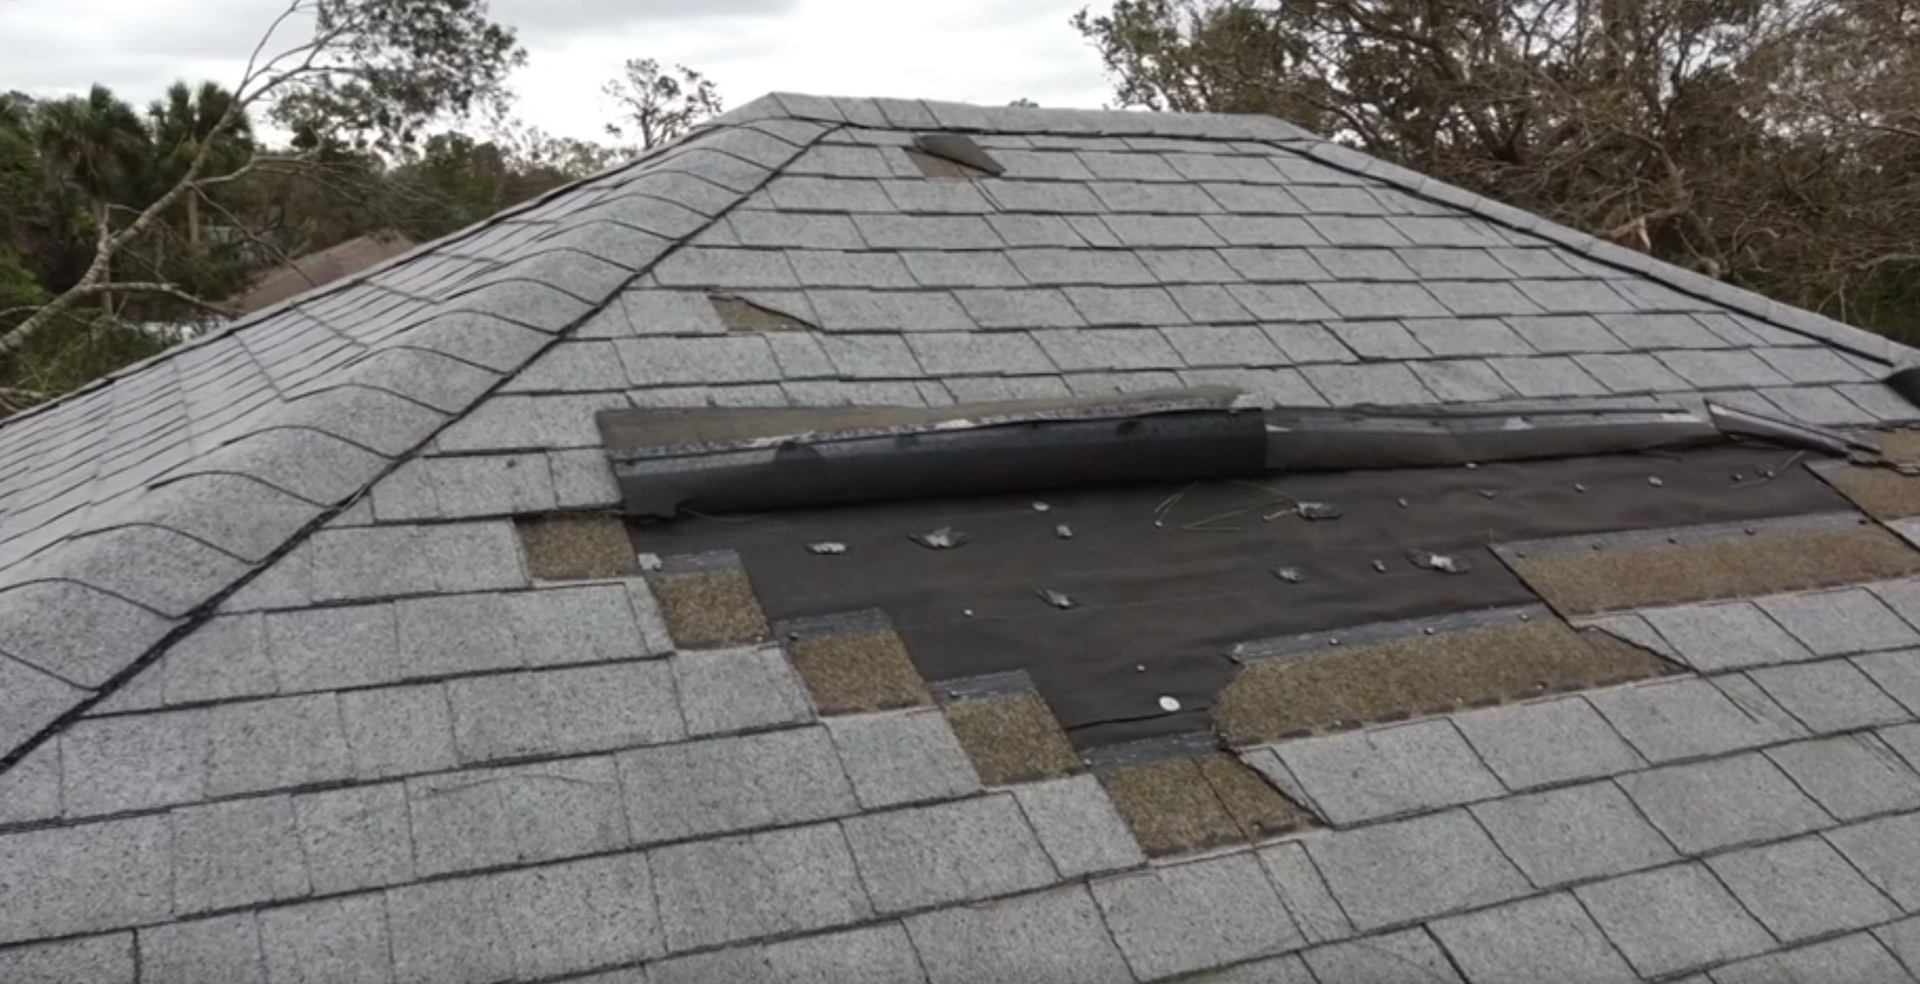
Inspection: Identifying Entry Points (shingles, flashing, valleys, penetrations)
Water usually enters at predictable weak points: valleys, flashing locations, roof-to-wall transitions, skylights, chimneys, and vent boots. Pros look for the most likely entry path based on where the leak shows up inside. A thorough roof inspection can identify these vulnerable areas.
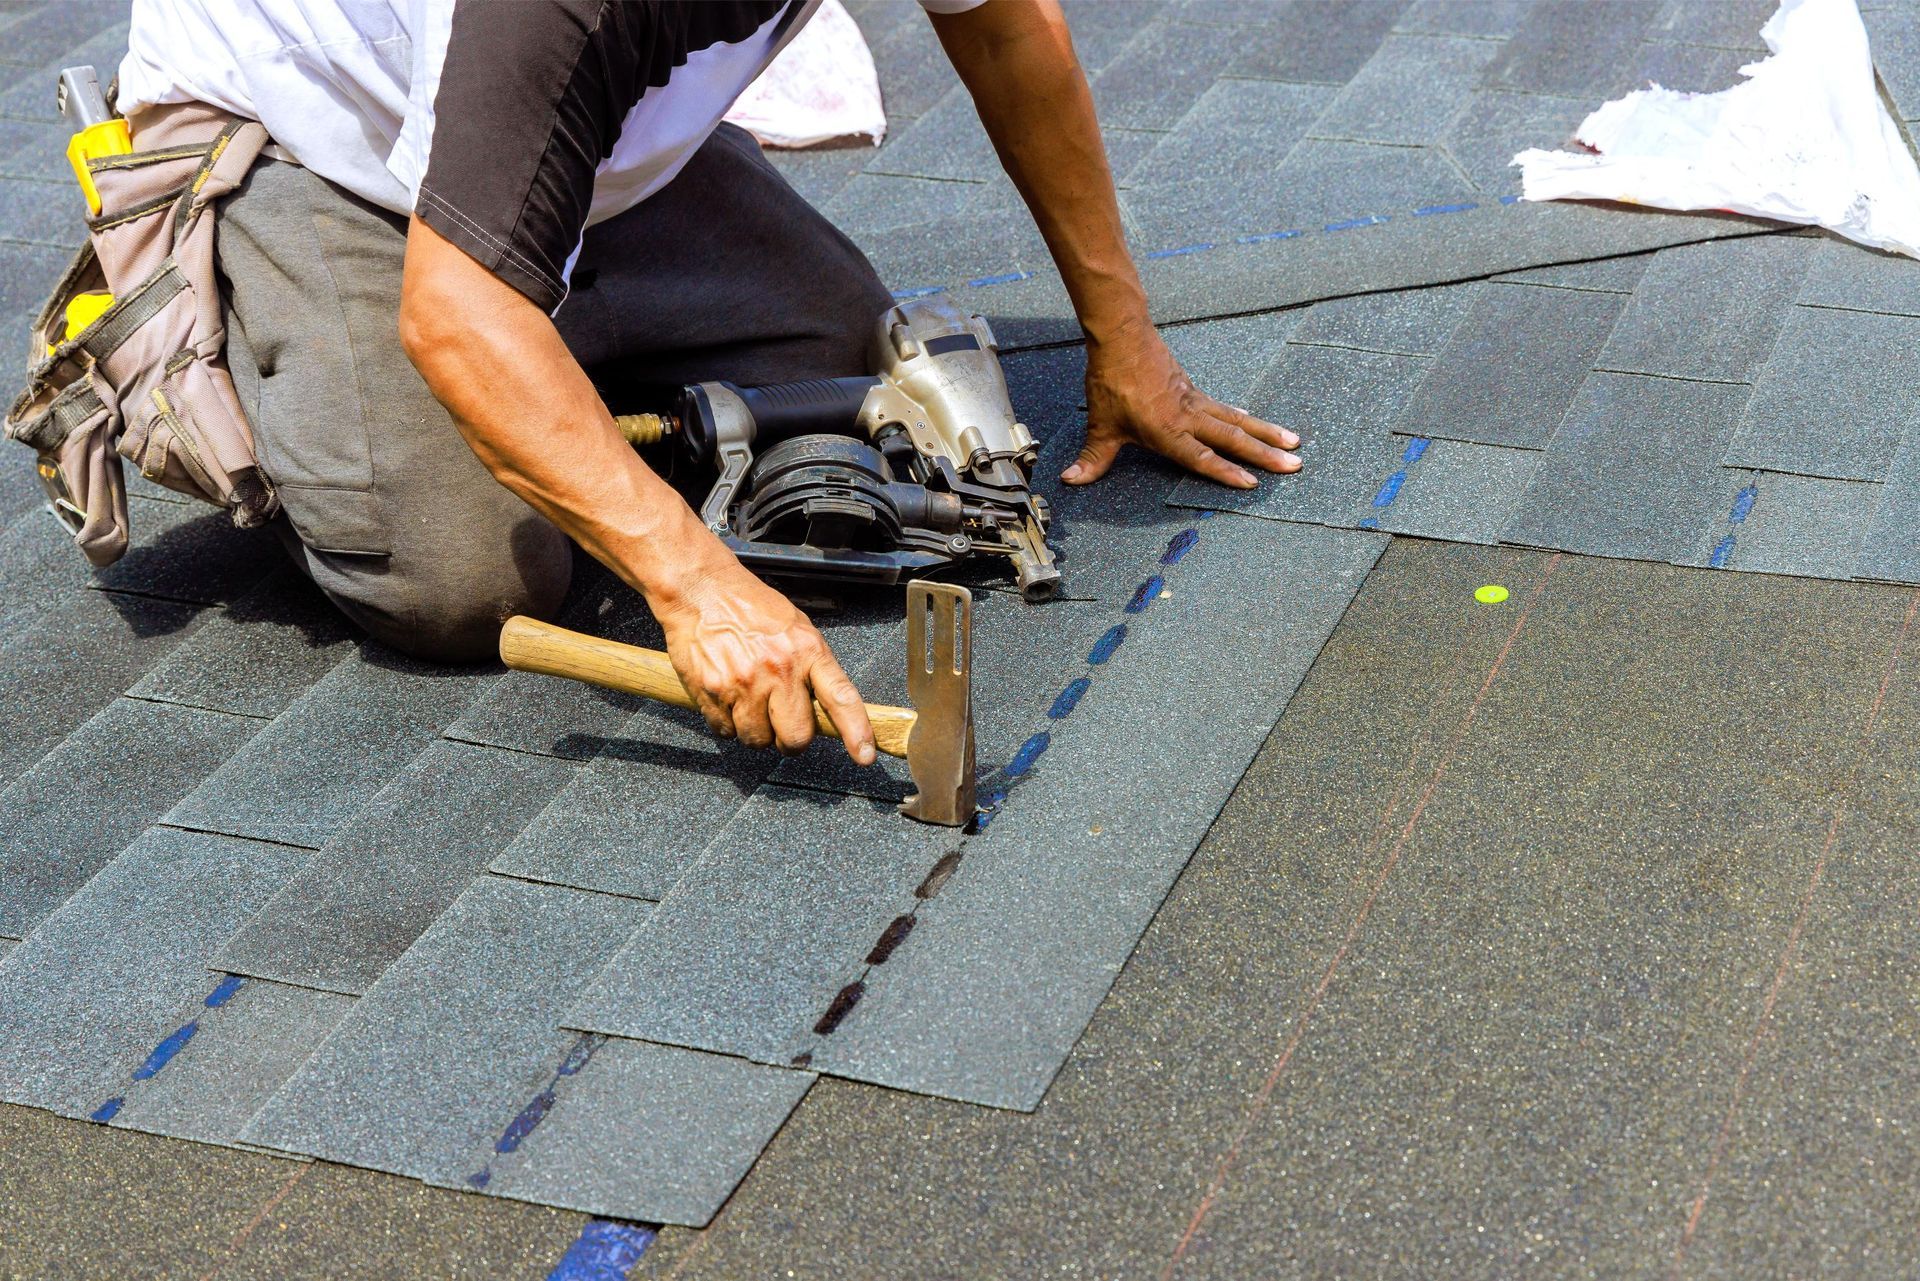
Controlled Ice Removal (methods that minimize shingle/gutter damage)
The goal is to remove ice without tearing up the roof system. In many cases, pros use methods designed to reduce damage risk, because broken shingles and bent flashing create bigger leak pathways.
Dry-Out and Moisture Check (attic, insulation, decking edges)
If insulation is soaked, it may need to be addressed. Wet insulation stays cold and damp, and it won't protect the roof from future melt patterns the way it should.
Repair Scope Options
Depending on what's found, repair may involve targeted shingle replacement, flashing repair, underlayment/edge detailing near the eaves, gutter/fascia/soffit repair, and interior patching after the area is fully dry.
Long-Term Prevention to Stop Repeat Leaks
Air Sealing First (the highest leverage fix)
If you only do one thing, focus on stopping warm air from entering the attic. Sealing attic hatches, penetrations, and leaky ceiling points often makes a bigger difference than "adding more insulation" alone.
Insulation Second (depth, coverage, consistency)
Next, ensure insulation coverage is even, especially near the eaves. Gaps and thin spots create hot zones that trigger melting.
Ventilation Third (balanced intake and exhaust)
Balanced ventilation helps keep attic temps stable and reduces moisture buildup. Soffit intake, ridge exhaust, and baffles to keep air paths open are common pieces of the puzzle.
Roofline and Drainage Improvements That Help
In some situations, targeted heat cable use can help manage problem sections, but it's not a cure-all. Drainage readiness matters too: clean gutters, functional downspouts, and clear runoff paths reduce refreezing at the edge.
Snow Management Habits That Reduce Recurrence
After big storms, safely reducing snow load at the eaves (from the ground) helps. The earlier you reduce the fuel source, the less likely a full ice ridge becomes.
Seasonal “Before the Next Storm” Checklist
Fall Prep: Inspection, Flashing Check, Gutter/Downspout Verification
Before winter hits, confirm gutters drain properly, check flashing areas, and address small roof-edge issues. Trim overhanging branches too, less debris means fewer drainage issues.
Winter Monitoring: Early Warning Signs to Watch for After Snow + Warm-up
After snow followed by sun or warmer temps, watch for rapid icicle growth, edge ice buildup, and new interior staining. Those are your early alerts.
Post-Winter Follow-up: Moisture/Damage Review and Permanent Fixes
Spring is the best time to fix root causes. If you've had even one ice dam leak, it's worth checking insulation, air sealing, and ventilation so next winter doesn't repeat the same problem. Ice damage often qualifies for storm damage roof repair coverage.
Frequently Asked Questions About Ice Dam Roof Repair
Can ice dams damage my roof even if I don't see a leak inside?
Yes. Ice dams can cause hidden damage long before you notice interior staining. Water may soak insulation, saturate roof decking, and create conditions for mold and wood rot, all while staying out of sight in your attic or wall cavities. The damage compounds over time, which is why addressing the root cause matters even after a "minor" leak.
Will removing the ice dam solve my problem, or will it come back?
Removing the ice is a short-term fix that stops active leaking, but it won't prevent the next ice dam from forming. Ice dams return when the underlying issues, attic heat loss, poor insulation, inadequate ventilation, remain unaddressed. Think of ice removal as emergency triage; the real solution is fixing what's warming your roof deck in the first place.
How much does it typically cost to prevent ice dams permanently?
Prevention costs vary based on your home's specific issues, but most homeowners invest between air sealing ($500–$2,000), insulation upgrades ($1,500–$4,000), and ventilation improvements ($500–$2,500). While that sounds like a lot, it's usually less expensive than repeated emergency repairs, water damage restoration, and the structural issues that develop when ice dams become an annual problem.
Are ice dams covered by homeowners' insurance?
It depends on your policy and the circumstances. Many insurance policies cover the resulting water damage from ice dams but not the cost of ice dam prevention or removal itself. If you're dealing with an active leak, document everything with photos and contact your insurance provider. Some policies have specific exclusions, so review your coverage before winter hits.
What's the single most effective thing I can do to prevent ice dams?
Air sealing your attic. Even homes with thick insulation can have ice dam problems if warm air is leaking into the attic through gaps around lights, plumbing penetrations, attic hatches, and ductwork. Stopping that heat escape, before adding more insulation, gives you the biggest return on investment and addresses the root cause of the melt-refreeze cycle.
Schedule a Roof/Attic Evaluation to Pinpoint the Real Cause and Prevent Repeat Leaks
If your home has had winter roof leaks before, the best next step is finding the true driver, heat loss, ventilation issues, insulation gaps, or vulnerable roof details, so you're not dealing with the same leak pattern every thaw.